Published September 1, 2020
How to create a cockade
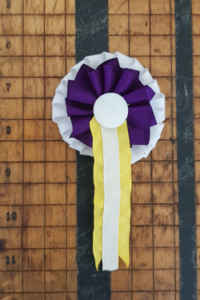
Cockades are pleated or knotted ribbons, typically worn on the chest to silently make a statement to peers. They have been worn over the centuries to display social or political stances, and in modern times to communicate high quality in products. The term “blue ribbon” is synonymous with being high quality or best in class, with cockades still being given out at competitions across the nation.
The wonderful thing about cockades is that there is no wrong way to make them. You could absolutely take a piece of raw ribbon and pin it to your shirt, and it would have the same effect. In relation to the suffragist movement, women who were too afraid to come out as suffragettes would display their quiet allegiance to the movement by wearing rings with the suffragette colors (pearls for the white, amethyst for the purple, etc.). Keep this in mind as you walk through the steps- have fun with it and make this cockade your own! If for any reason you become stuck in the process or want a different ribbon pleat, look for videos on YouTube!
WHAT YOU WILL NEED
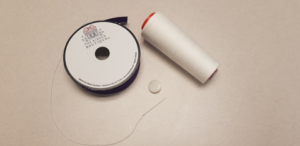
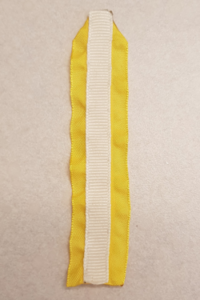
- Ribbon(s)
- Needle
- Thread
- Decorative button (for center)
- Brooch clasp pins or a safety pin
- Optional:
- a piece of felt or suede (to cover stitches on back)
- iron or a heavy book to flatten ribbon
- pins (to help with spreading pleats)
- ruler (for uniform pleating)
INSTRUCTIONS
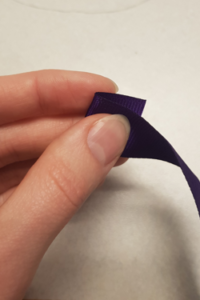
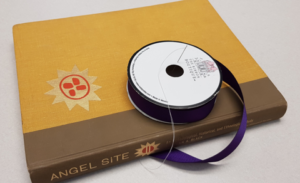
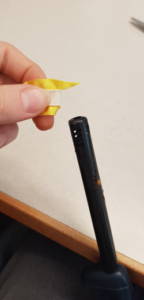
Take the desired ribbon (cotton if shooting for historical accuracy), and begin pleating. (Hint: Give yourself more of a tail to work with at the end than I did- a longer tail makes the ends easier to hide). Pleating is done by folding the ribbon back, and then laying the ribbon back over to where you started. Your first pleat will look like a “w”.
Do only a few pleats at a time, either by eyeing or by using a ruler to make the pleats even. To help mark measurements if using a ruler, refrain from using marker and use pins or chalk instead. I like a more rustic appearance, so I will not be using a ruler.
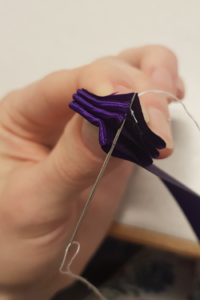
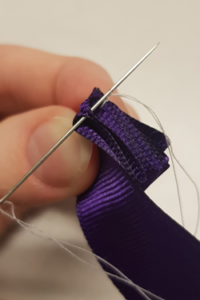
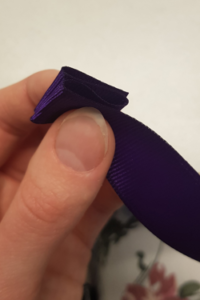
Take a needle and thread and begin to backstitch the corner of the pleat folds, which will form the middle of the cockade once completed.
Keep pleating and stitching until the desired size and number of pleats is reached. Anywhere from 12-16 pleats will make a full cockade. More pleats will be necessary for a larger cockade. Optional: begin to pin pleats in place as you start to fan out the ribbon. Either side can be the “face” of the cockade. Iron gently at this point or press with a book.

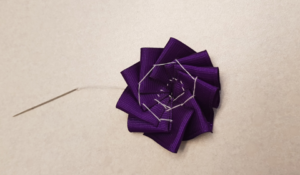
Finish cockade by basting stitches around in a circular fashion on the back of the cockade to secure the pleats in place. Excuse my sloppy foundation stitching.

I decided to do something a little extra and added a ribbon to help cover the ugly tail I could not tuck in, and to tie it better to my suffragette hat. I simply connected the gold and white ribbon with a running stitch. At this point I also decided to combat fraying with a lighter.
There are a few different ways to prevent frayed ribbon ends: a clear coat of nail polish, glue, or if you’re using a polyester blend, simply melt the ends. BE CAREFUL WITH OPEN FLAMES. Give yourself enough distance between the ribbon and the flame to remain in control of the melting process.
Now it’s time for the finishing touches. You can either repeat the steps above to make another ribbon cockade for a layered look, or stop at one ribbon.
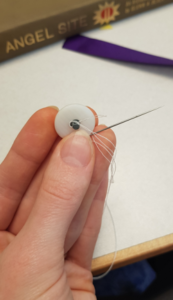
To attach the button, simply thread your needle and tie a knot in the end of the thread. I like to double the thread, making it not only stronger but easier to attach to the button. Whatever kind of button you use, simply pass the needle through the button (or up and over through two holes) and run needle through between the two pieces of thread, looping the button to the needle.
Place the button in the center of the cockade and begin to attach the button to the edges of the center hole.
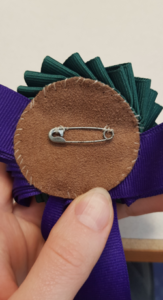
On a different cockade I made, I placed a piece of suede on the back to make it appear more put together. Before I attached the suede, I opted to use a safety pin as the pin to hold the cockade to my clothing. I sewed the safety pin down and then attached the suede backing to the cockade.